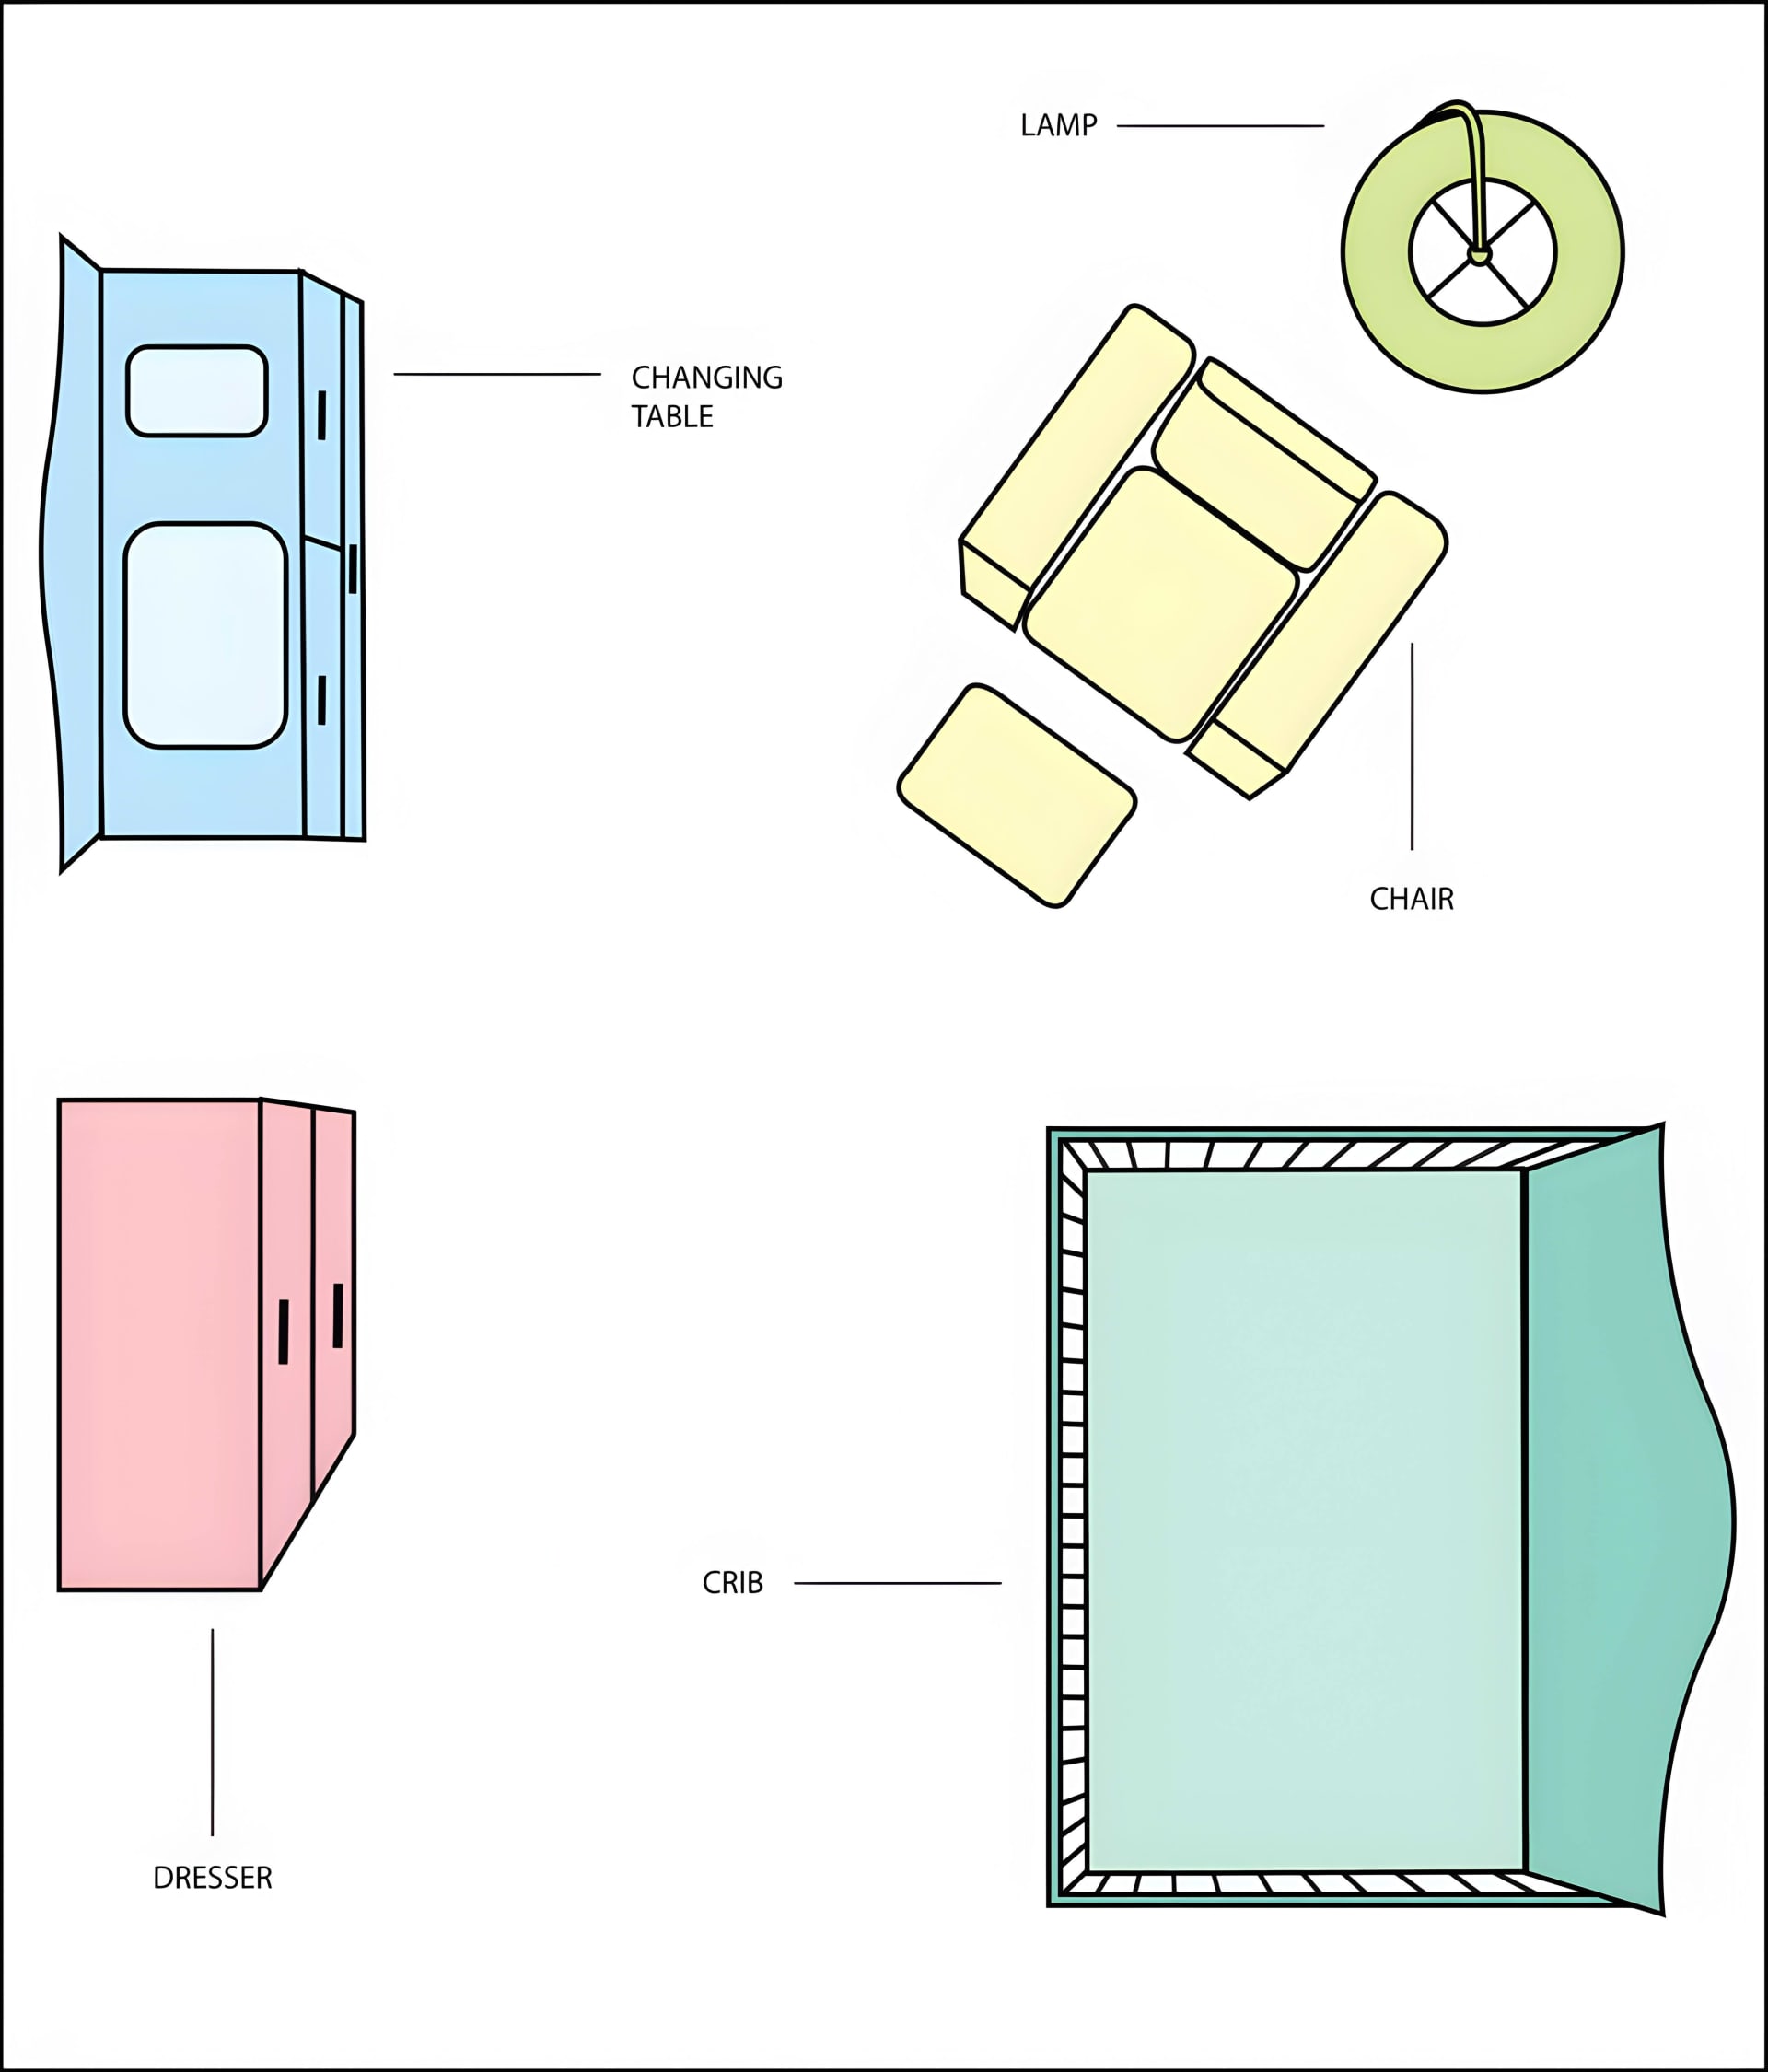
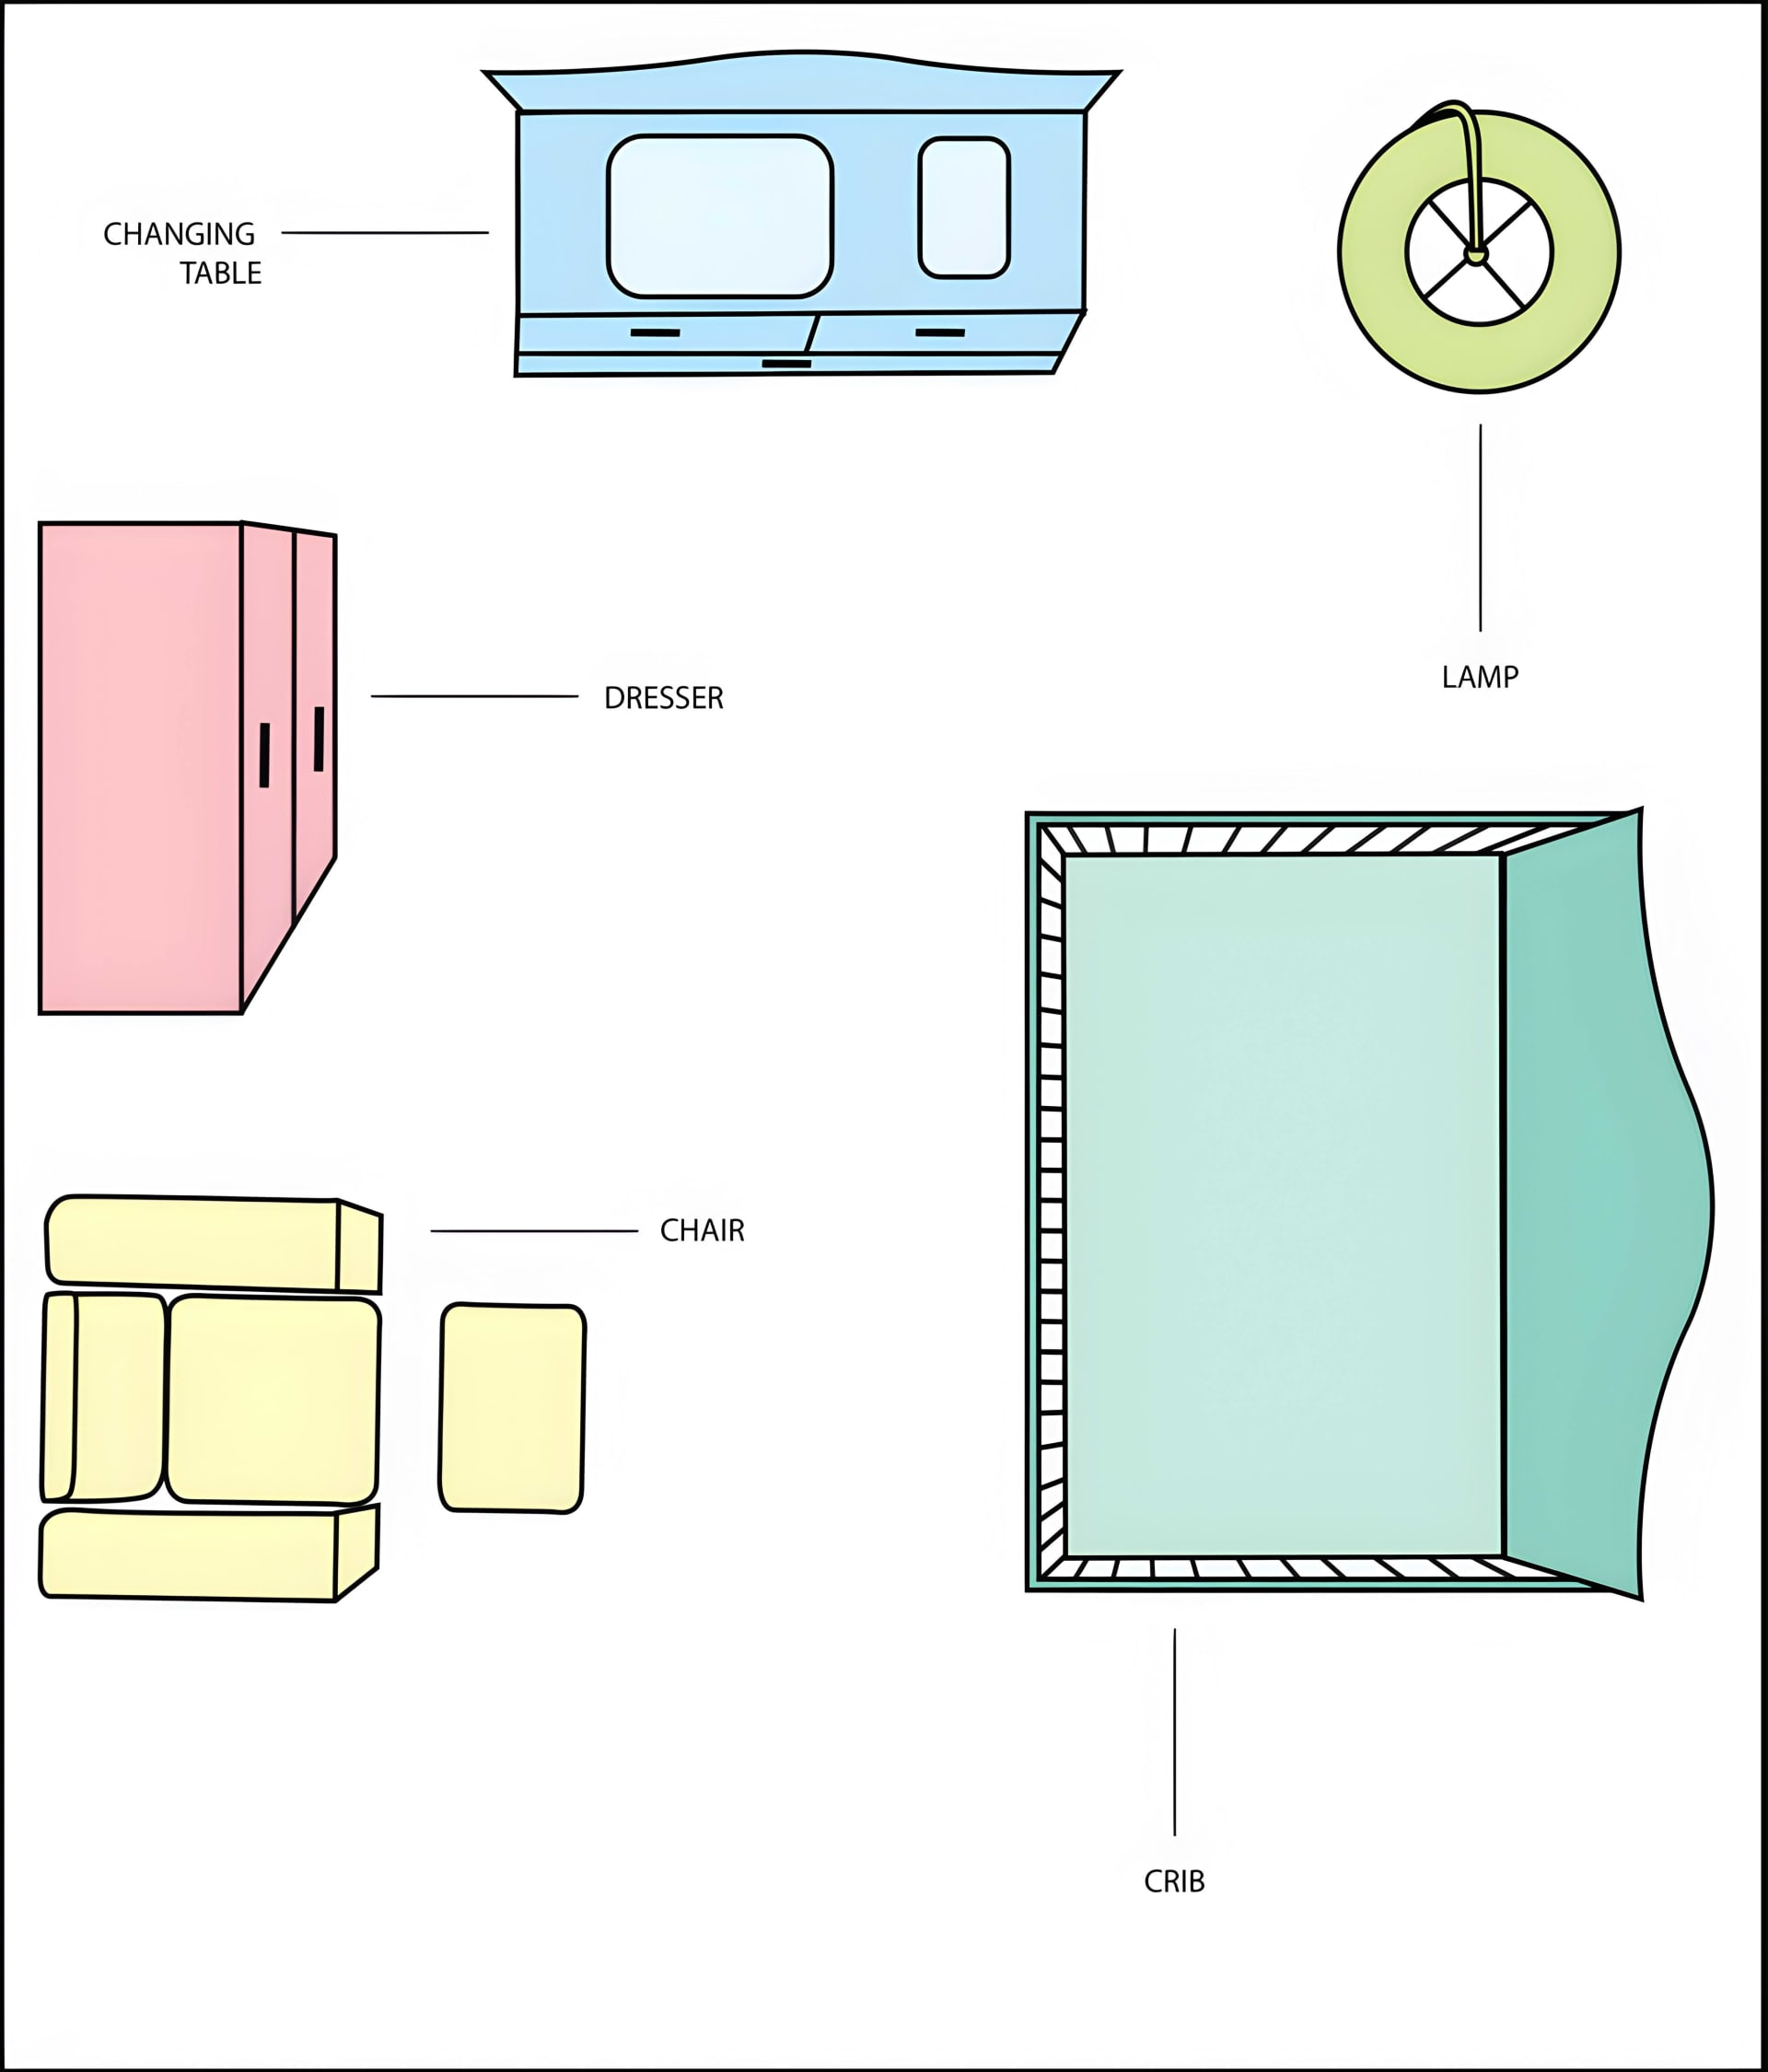
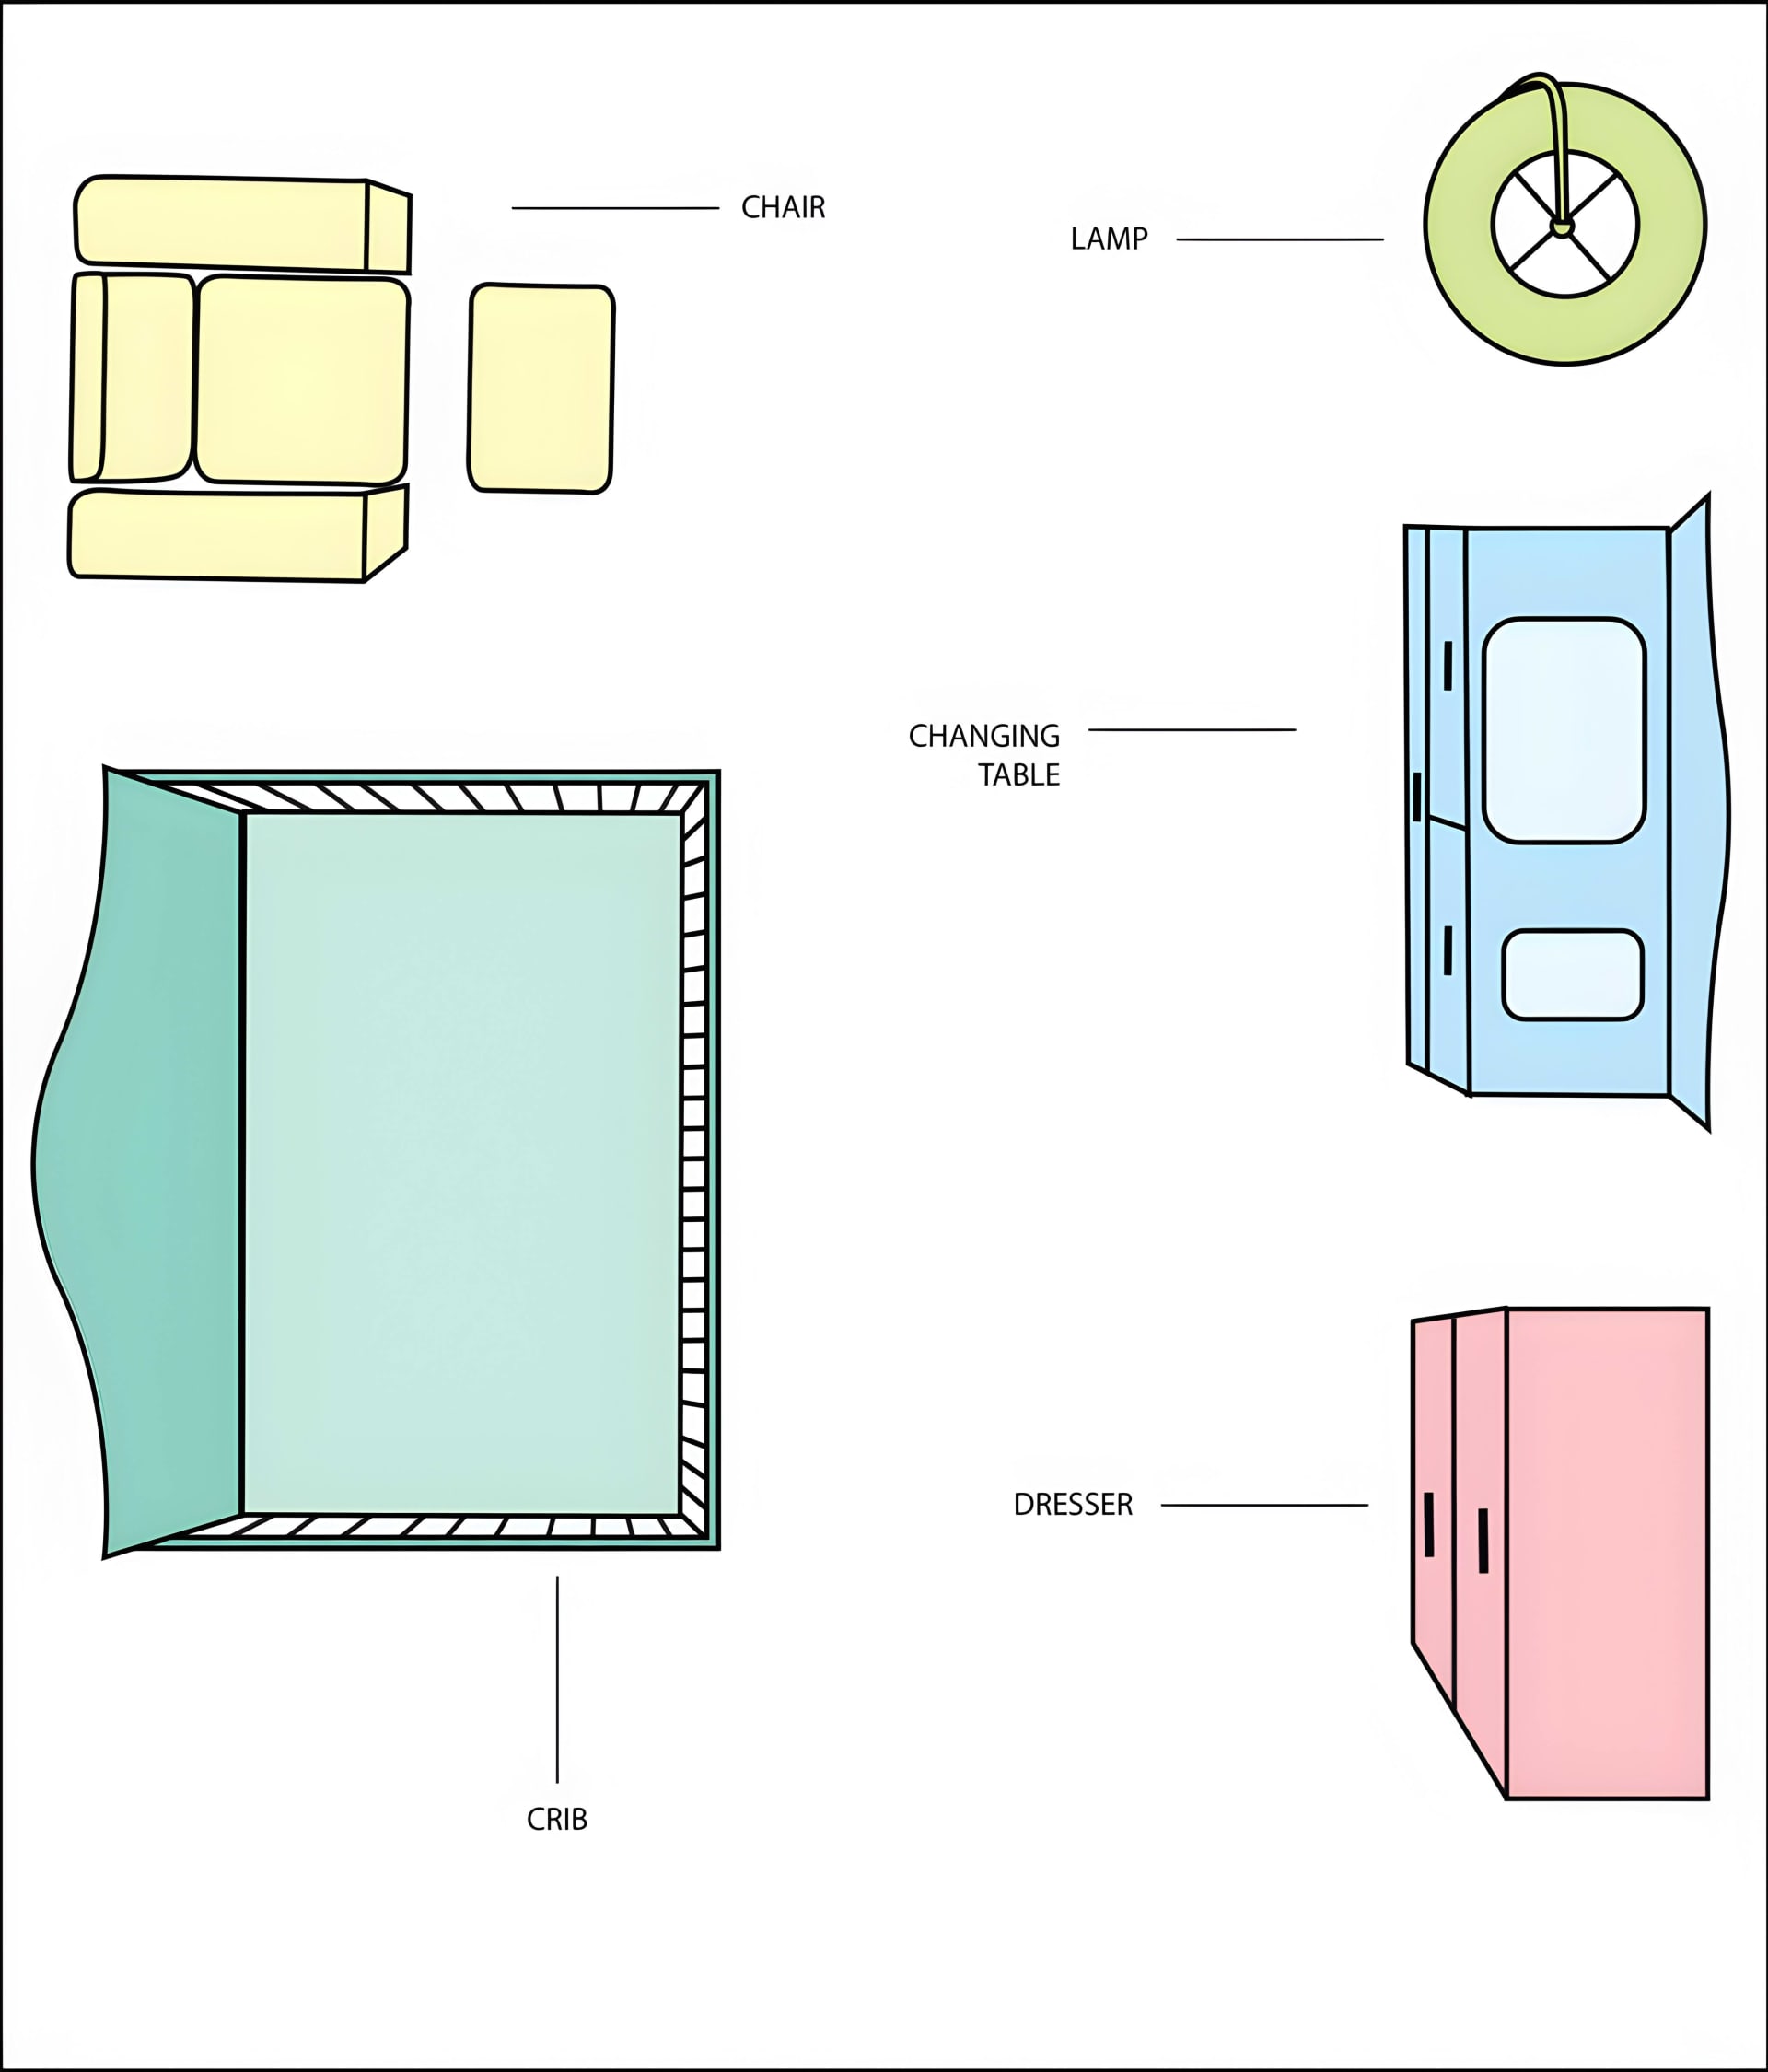
3 Nursery Layouts
Your bundle of joy is on the way, and it’s time to create the perfect nursery! Designing a cozy, functional space for your little one can feel overwhelming...especially with so many options for cribs, rugs, lamps, dressers, changing tables, rocking chairs, and more.
To make things easier, we’ve created three unique nursery layouts to help you visualize how to arrange your furniture. Each layout offers a different flow, so you can choose the one that works best for your space and lifestyle.
Let’s take a closer look at each design and what makes it special!

Option 1: Cozy Corner Layout
In this layout, the focus is on creating a snug and intimate space for bonding moments with your baby.
How to Arrange It
- Start by positioning the crib along the right wall as your anchor piece, ensuring it's at least 2-3 feet away from windows to avoid direct sunlight and drafts
- Place the changing table on the left wall, ideally near a window for natural light during diaper changes
- Position the dresser next to the changing table to keep storage within arm's reach
- Create your cozy nook by placing the rocking chair in the top-right corner, close to the crib but not blocking the doorway
- Mount the floor lamp next to the chair, angling it toward the chair for reading light during nighttime feedings
- Ensure there's a clear walking path from the door to each major piece of furniture
Tips & Recommendations
- Changing Table Placement: Consider a changing table with built-in storage drawers to keep diapers, wipes, and essentials organized in one compact unit
- Rocking Chair Selection: Look for a chair with a low profile and rounded edges for safety; gliders with locking mechanisms are ideal for preventing unexpected movement
- Lighting: Install a dimmer switch or choose a lamp with adjustable brightness to create soft light for late-night feedings without fully waking your baby
- Wall Space: Use vertical storage on the left wall (floating shelves above the dresser) to maximize space without adding floor clutter
- Safety Buffer: Leave at least 18 inches of clearance around the crib on all accessible sides for safe mattress changes and baby access
- Carpet or Rug: Add a plush rug under the chair to define the cozy nook and provide comfort during extended seating sessions
- Consider a Night Table: A small side table next to the chair can hold water, a book, or a baby monitor for convenience
Why it works: This layout is perfect for smaller nurseries or parents who want everything close together for convenience. The chair-lamp pairing near the crib ensures a warm and practical feeding area.
Option 2: Open & Spacious Layout
This layout spreads out the furniture to give the room a more open and airy feel.
How to Arrange It
- Begin by placing the crib on the right wall with plenty of clearance (3-4 feet minimum) on both sides for safe sleeping and mobility
- Position the changing table at the top of the room where it has good natural light and is easily accessible from the doorway
- Move the dresser to the left wall, creating a visual balance opposite the crib
- Place the rocking chair beside the dresser on the left wall, creating a defined sitting and lounging area that's separated from the sleeping zone
- Mount the floor lamp in the top-right corner to provide ambient lighting without creating shadows on the changing table or crib
- Arrange any additional furniture or storage units (baskets, shelving) along the perimeter to maintain the open feel in the center of the room
Tips & Recommendations
- Changing Table Height: Choose a changing table at 36 inches high to minimize back strain during frequent changes; ensure it has safety straps
- Dresser Style: Opt for a tall dresser to keep the footprint small while providing ample storage for clothing and linens
- Zoning with Rugs: Use one rug under the changing area and another under the chair to visually define separate zones without using walls
- Lighting Strategy: In larger rooms, consider adding a second adjustable lamp near the changing table for task lighting
- Air Flow: Keep the center of the room open to allow air circulation and make the space feel even more spacious
- Furniture Arrangement: Space pieces at least 2-3 feet apart to create sight lines that make the room feel larger and reduce the sense of clutter
- Open Shelving: If using open shelves instead of a closed dresser, organize items in matching bins to maintain a clean, spacious aesthetic
- Future Growth: This layout adapts well as your child grows—easily converts to a toddler bedroom by repositioning furniture
Why it works: Ideal for larger nurseries or parents who prefer a more spacious design. This layout separates key areas—sleeping, changing, and sitting—while maintaining functionality.
Option 3: Balanced Layout
This design focuses on symmetry and balance by rearranging key pieces of furniture.
How to Arrange It
- Position the crib on the left wall as your primary anchor, leaving adequate clearance for safe crib operation and future transitions
- Place the rocking chair directly next to the crib on the left wall to create a unified sleeping and bonding zone
- Move the changing table to the right wall, ideally near a window if possible, for natural light and ventilation during changes
- Position the dresser beside or below the changing table on the right wall to create a balanced mirror image of the left side
- Install the floor lamp in the top-right corner to balance the visual weight of the furniture arrangement on both sides
- Ensure equal spacing between the two main zones (sleeping on the left, changing/storage on the right) to achieve visual equilibrium
Tips & Recommendations
- Symmetrical Décor: Keep wall décor and accessories balanced on both sides—add a small wall shelf or artwork above the dresser to mirror elements near the crib
- Consistent Lighting: Ensure the floor lamp in the corner effectively illuminates both sides of the room; consider adding a small wall sconce above the dresser
- Rug Placement: Use one cohesive rug in the center of the room, or two smaller matching rugs—one under the chair and one under the changing table—to reinforce the balanced layout
- Trac Flow: Position the changing table and dresser so caregivers can easily access both without crossing paths or blocking the nursery door
- Crib Styling: Use matching bedding and decorative elements to tie the crib and chair together visually as a unified sleeping zone
- Storage Integration: Install shelving or a wall-mounted organizer above the dresser to maximize right-wall storage without adding floor furniture
- Temperature Control: Position furniture to avoid blocking air vents or radiators; ensure airflow reaches both the crib and changing areas
- Growth Flexibility: This balanced approach easily transitions from baby-centered to child-focused as furniture can be rearranged while maintaining the room's functional symmetry
Why it works: This layout is great for parents who value symmetry and want a clear division between sleeping and storage areas. It also provides flexibility for future adjustments as your child grows.
Customizing Your Nursery
While these layouts offer inspiration, every nursery is unique! Feel free to mix and match elements to fit your space and style. Here are some tips to keep in mind:
- Save Space: Consider using a dresser with a changing pad on top instead of a separate changing table.
- Skip What You Don’t Need: If you don’t plan on using a rocking chair, you can save valuable floor space by leaving it out.
- Prioritize Comfort: Late-night feedings are much easier with a cozy chair near your baby’s crib.
No matter which layout you choose, remember that your nursery should reflect your family’s needs and style. Have fun designing this special space—you’ll be spending lots of precious moments here!